 Afrikaans
 Azərbaycan
 Bosanski
 Čeština
 Dansk
Dansk Deutsch
 English
 Español
 Filipino
 Français
 Hrvatski
 Indonesia
 Italiano
 Magyar
 Melayu
 Nederlands
 Norsk
Norsk Oʻzbek
 Polski
 Português
 Română
 Slovenčina
 Slovenščina
 Suomi
Suomi Svenska
 Tiếng Việt
 Türkçe
 Ελληνικά
 Беларуская
 Български
 Русский
 Српски
 Українська
 עברית
עברית اردو
اردو العربية
 پښتو
پښتو فارسی
فارسی አማርኛ
አማርኛ मराठी
मराठी বাংলা
বাংলা தமிழ்
தமிழ் ไทย
ไทย မြန်မာ
 한국어
한국어 中文
中文 日本語
日本語

Mechanical Keyboard Lubing and Switch Replacement are two essential modifications that enhance the keyboard's sound, provide a smoother key feel, and personalize the overall user experience. The short answer is this: Switching out switches on a hot-swappable mechanical keyboard usually takes about 15-30 minutes; lubing switches requires an average of 2-4 minutes per switch. With the right lube, appropriate brush, switch opener, and careful assembly, the scratchy sensation is reduced, spring noise is diminished, and the keyboard offers a more premium experience.
This guide focuses solely on the niche applications of mechanical keyboard lubing and switch replacement. Rather than a generic keyboard review, RGB settings, or overall hardware advice, we will delve into practical details that make a difference, such as how to open switches, where to apply lube, why clicky switches are generally not lubed, how to remove switches from hot-swap sockets without breaking them, and what to watch out for on soldered keyboards. If you play games, write lengthy texts, develop code, or spend hours on web projects, improving your keyboard feel will directly impact your daily productivity. If you’re planning to set up your own website, portfolio, or technical blog, you can also check out Web Hosting Packages and Domain Lookup resources for relevant infrastructure.
What Are the Benefits of Mechanical Keyboard Lubing and Switch Replacement?
Most of the sound and feel in a mechanical keyboard comes from the combination of the switch housing, stem, spring, plate, case structure, and stabilizers. The lubing process reduces the rough sensation by carefully covering non-contact or low-contact friction points within the switch. Switch replacement can completely change the character of the keyboard. With a linear switch, you get a quick and smooth feel, while a tactile switch provides a more pronounced actuation point. Clicky switches are suitable for users who prefer audible feedback.
For example, a keyboard used in an office setting with loud blue switches can be disruptive during meetings. Replacing it with quieter linear switches and lightly lubing the springs can significantly lower the sound level. For someone gaming at home, low-weight linear switches can provide a faster response feel. For coders or content creators, tactile switches can offer more pronounced feedback, potentially reducing errors. Thus, modding a mechanical keyboard is not just a hobby; it is about ergonomics and optimizing productivity.
Before You Begin: Is Your Keyboard Hot-Swap or Soldered?
Before you start replacing switches, you need to determine whether your keyboard is hot-swappable or soldered. In hot-swap keyboards, switches fit into sockets on the PCB and can be easily removed and installed with the right switch puller. In soldered keyboards, each switch has two metal legs that are soldered to the PCB. In this case, switch replacement requires a solder pump, solder wick, soldering iron, and a higher level of manual skill.
Hot-swap models are much safer for beginners. Correcting a misaligned switch leg is often all that's needed. In soldered models, excessive heat can lift the PCB pads and permanently damage the keyboard. If you are trying this for the first time, it is recommended to practice on a hot-swappable keyboard first.
How to Recognize a Hot-Swap Keyboard?
- The product description includes terms like hot-swappable, hotswap, or hot-swap socket.
- Usually, a keycap puller and switch puller come in the box.
- When a switch is removed, Kailh, Gateron, or Outemu-style sockets are visible on the PCB.
- The keyboard software changes only key assignments, not switch types; switch replacement is a physical task.
What Are the Risks of a Soldered Keyboard?
- PCB pads lifting or breaking off.
- Excess heat causing the switch housing to melt.
- Incorrect soldering resulting in keys registering double presses or not working at all.
- Voiding the warranty.
If you are working on a soldered keyboard, you will need a controlled soldering iron in the 300-350 degree range, quality solder wick, and a patient working method. Disassembling and re-soldering a keyboard with 60-70 switches can take anywhere from 2 to 5 hours, depending on experience. This time does not include testing, cleaning, and correcting stages.
Required Materials and Average Costs
Lubing a mechanical keyboard does not have to be expensive, but the right equipment makes a difference. Using random machine oil, grease, or spray lube can damage switches. It's essential to choose products that are electronic compatible, safe for plastic, and recognized within the keyboard community.
| Material | Purpose | Note |
|---|---|---|
| Switch opener | To open the switch housing | Cherry MX compatible and Kailh compatible types may vary |
| Fine brush | To apply lube | 00 or 0 size brushes are ideal |
| Krytox 205g0 | Lubing linear switches | Provides a firm and smooth feel when used sparingly |
| Tribosys 3203/3204 | Lubing tactile switches | Can be applied without killing the tactile bump feel |
| Krytox 105 oil | Lubing springs | A practical option for bag lubing |
| Switch puller | To remove switches | Must be used carefully to protect hot-swap sockets |
| Keycap puller | To remove keycaps | Wire types leave less scratching on the keycap surface |
| Tweezers | To hold springs and stems | Clean and non-magnetic models are practical |
As of 2026, an entry-level lubing kit generally ranges from a few hundred dollars to higher hobby budgets, depending on the selected brand. The main cost comes from the number of switches and the quality of the lube used. A 75% keyboard typically has around 80-84 switches. Since only a tiny amount of lube is used for each switch, 5 grams of quality lube is usually sufficient for multiple keyboards for most users.
Which Switch Should Be Lubed with Which Lube?
Not every switch is lubed the same way. The biggest mistake is covering the bump area on tactile switches with thick lube or fully lubing clicky switches, which can ruin the sound mechanism. The choice of lube should be based on the switch type.
Linear Switches
Linear switches do not have a distinct tactile bump throughout the actuation. Therefore, the switch type that benefits the most from lubing is typically linear switches. Krytox 205g0 applied thinly and controlled on switches like Gateron Yellow, Cherry MX Black, Akko Cream Yellow, and KTT Kang White can significantly reduce the scratchy feel. Applying a small amount of lube to the stem rails, lower housing rails, and spring contact points is sufficient.
Tactile Switches
The goal with tactile switches is to reduce roughness while maintaining the tactile bump character. In switches like Boba U4T, Glorious Panda, Akko Lavender Purple, and Cherry MX Brown, using thick lube excessively can flatten the key feel. Therefore, lighter options like Tribosys 3203 or 3204 can be preferred. Avoiding direct application of heavy lube to the stem legs is generally safer.
Clicky Switches
Clicky switches are the riskiest group for lubing due to their audible mechanism. In switches like Cherry MX Blue, Kailh Box White, or similar click bar/click jacket systems, incorrect lubing can muffle or make the click sound inconsistent. In these switches, lubing the spring is often the only lubrication done to reduce the ping sound; applying lube to the housing and stem mechanism is not recommended.
Step-by-Step Guide to Lubing a Mechanical Keyboard
The basic principle in the lubing process is: less lube is always safer than too much. Excessive lube can weigh down the switch, slow down the return, and make the key feel mushy. For professional results, a clean workspace, good lighting, and patience are required.
1. Prepare the Keyboard
First, disconnect the keyboard from the computer. If it's a wireless model, turn off the device and, if possible, disable the battery connection. Use a wire keycap puller to pull the keycaps off at a right angle. Arranging the keycaps in order or taking a photo can save time during reassembly. Especially in 65%, 75%, and Alice layouts, some key sizes can get mixed up.
2. Remove the Switches
In a hot-swap keyboard, use a switch puller to press down on the top and bottom clips of the switch simultaneously. Pull the switch straight up without shaking it side to side. If the switch isn’t coming out, don’t force it; the clips may not be fully pressed. Forcing it could tear the hot-swap socket from the PCB. In a soldered keyboard, the solder on the switch legs must be completely removed first.
3. Open the Switches
Place the switch in the correct orientation on the switch opener and press down. The upper housing, stem, spring, and lower housing will separate into four main parts. To avoid mixing parts, divide your workspace into sections. Instead of opening all switches at once on an 80-switch keyboard, working in groups of 10 reduces the risk of mistakes.
4. Lube the Springs
The bag lubing method can be used to reduce spring ping noise. Place the springs in a small zip-lock bag, add 2-4 drops of Krytox 105 oil, and gently shake the bag for 30-60 seconds. The goal is not to soak the springs but to create a thin film layer. Alternatively, a small amount of 205g0 can be applied to both ends of the springs with a brush.
5. Lube the Lower Housing
Apply a very thin layer of lube to the rails where the stem moves in the lower housing. There should be no visible clumps on the brush. Be careful not to get lube on the metal leaf section. Getting lube on the leaf can change the feel, especially in tactile switches, or cause inconsistencies in key detection.
6. Apply Lube to the Stem
In linear switches, a thin layer is applied to the side rails and lower contact areas of the stem. In tactile switches, care must be taken with the stem legs. If you want to maintain the bump feel, it’s better to apply no lube or an extremely small amount. If the brush leaves a mark but doesn’t create lube puddles, you’re close to the right amount.
7. Close the Switch and Test
Place the spring in the lower housing, stem in the correct orientation on top of the spring, and the upper housing so that the clips fit together. After closing the switch, press it a few times to check the return speed. If the key feels heavy or sticky, you may have used too much lube. Testing the first 3-5 switches and listening to the result is much better than incorrectly lubing the entire keyboard.
Step-by-Step Guide to Switch Replacement
Switch replacement is the quickest way to change the feel of a keyboard. With the right switch choice and careful installation, you can transform the same case into a completely different character on a hot-swappable keyboard. However, compatibility checks are critical.
1. Check Pin Compatibility
Switches typically come in 3-pin or 5-pin configurations. 5-pin switches have two additional plastic mounting legs. If your PCB supports 3-pin, the plastic legs on 5-pin switches can be cut with nail clippers or flush cutters. However, this is irreversible. If your PCB supports 5-pin, then 5-pin switches will fit more stably.
2. Check the Socket Type
Kailh hot-swap sockets are compatible with most MX-style switches. Outemu hot-swap sockets may have tighter tolerances with some switch legs. When inserting switches of different brands into Outemu sockets, the thickness of the metal pins can cause issues. Instead of forcing them, the pins should be straightened, and compatibility should be researched.
3. Straighten the Switch Pins
Before inserting new switches, check if the metal pins are bent. A bent pin may not enter the socket and can curl underneath the switch. In this case, the key will not work. Ensure that you align the switch with the plate and PCB holes before pressing it down. If you feel resistance, stop immediately and check the pins.
4. Test with Software
After installing all switches, use an online keyboard tester or VIA/QMK compatible software to test each key. If a key is not functioning, don’t panic. The most common cause is a bent pin. Remove the switch, straighten the pin, and reinstall it. If multiple keys are not working, the hot-swap socket or PCB trace may be damaged.
Lube and Switch Selection Comparison Table
| Use Case | Recommended Switch Type | Recommended Lube Approach | Expected Outcome |
|---|---|---|---|
| Gaming | Light linear | Thin 205g0 on stem rails, 105 oil on springs | Fast, smooth, and low-friction actuation |
| Coding | Medium-weight tactile | 3203/3204, careful with bump area | Clear feedback and more controlled typing |
| Office Use | Quiet linear or silent tactile | Thin lube, supported by stabilizer mod | Lower noise and a more solid feel |
| Sound-focused Hobby | Thocky linear | Controlled application of 205g0 | Fuller sound described as thocky |
| Clicky Experience | Clicky switch | Generally just spring lubing | Click character preserved, spring sound reduced |
Common Mistakes
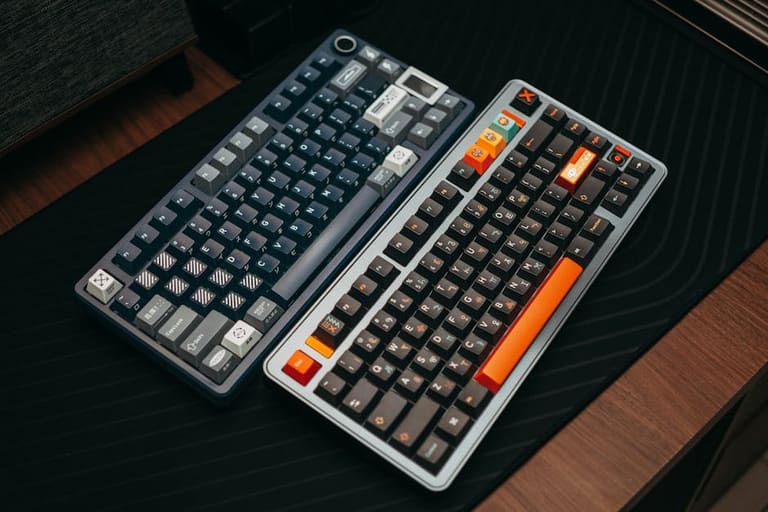
Most issues in mechanical keyboard modding stem from rushing and using too much lube. Especially on the first attempt, the goal is not to achieve a perfect sound but to create a consistent and smoothly functioning keyboard.
- Using too much lube: This causes the switch to feel heavy and return slowly.
- Getting lube on the metal leaf section: This can lead to detection issues or a change in feel.
- Fully lubing a clicky switch: This can reduce the click sound or make the mechanism inconsistent.
- Installing switches with bent pins: This causes the key to not work.
- Forcing a hot-swap socket: This can lead to the socket breaking off the PCB.
- Neglecting stabilizers: Rattle can persist on larger keys like Space, Enter, and Shift.
There's an important practical note here: Lubing only the switches does not necessarily make the keyboard quiet. If there’s rattle on larger keys due to stabilizers, even the best-lubed switches cannot salvage the overall sound quality. While stabilizer modding is not the main focus of this article, using dielectric grease or suitable stabilizer lube on larger keys can make a significant difference in the overall experience.
Expectations for Sound, Feel, and Performance: Realistic Results
The expected changes after lubing vary depending on the switch type and keyboard structure. Lubing switches in a plastic-cased, hollow interior keyboard reduces roughness but doesn’t completely resolve case resonance. In a well-insulated aluminum-cased keyboard with quality keycaps, the same lubing might be much more noticeable. So, lube is not a miracle; it’s part of the system.
In practice, a well-executed lubing of linear switches leads to the following differences: less spring noise, smoother actuation, a deeper sound, and a more consistent key feel. The difference in tactile switches is more limited but controlled. In clicky switches, the primary gain is in reducing the spring ping sound.
At this point, it’s also important not to forget the context of digital productivity. For a blogger, developer, system administrator, or e-commerce manager who writes for hours, the keyboard is not just an accessory. Just as choosing What is SSD Hosting or WordPress Hosting is important for a fast and reliable web infrastructure, the feel of the keyboard in a physical workspace is also critical for continuity and comfort.
Maintenance, Cleaning, and Longevity Tips
Lubed switches usually do not require reworking for a long time. However, usage intensity, environmental dust, and the amount of lube all affect performance. Even under heavy daily use, a properly lubed switch can maintain its performance for 1-2 years. It's a good idea to regularly remove keycaps and clean the surface in very dusty environments.
- Always disconnect the keyboard before cleaning it.
- Be careful not to spray liquids when using compressed air.
- You can wash keycaps in warm soapy water; do not reattach until they are completely dry.
- Do not spray alcohol or cleaning spray inside the switches.
- Do not leave the keyboard in direct sunlight or in high-humidity environments.
If your keyboard is wired, using a high-quality and durable USB cable reduces connection drops. In wireless models, battery health should be monitored. When updating keyboard software or firmware, choose reliable sources. If you are setting up a website to publish your technical content, secure connections for SSL Certificate and basic protection for Website Security are also important.
When to Seek Professional Support?
Most users can perform switch replacements at home on hot-swappable keyboards. However, in soldered keyboards, rare PCBs, expensive custom kits, or products still under warranty, seeking professional support may be sensible. Especially in custom keyboards costing $300 or more, a single PCB error can lead to substantial costs.
The best course of action is to stop work if: a switch won’t come out and you find yourself applying excessive force, if the hot-swap socket has come loose, if the solder pads are darkened or lifted, or if an entire row or column isn’t working instead of just one key. These signs can indicate more serious PCB issues than simple switch errors.
Mini Checklist: A Safe Plan for Your First Modding
- Verify whether your keyboard is hot-swap.
- Check pin compatibility of the switches.
- Start with 3-5 switches for testing.
- Use a small amount of 205g0 for linear switches and 105 oil for springs.
- Preserve the bump area in tactile switches.
- Avoid lubing the body of clicky switches.
- Test every 10-15 switches.
- After assembly, check all keys with software or an online testing tool.
This plan reduces the error cost for users modding a mechanical keyboard for the first time. As you gain experience, you can move on to more advanced mods like different lube mixes, film mods, spring swaps, and case insulation. However, if the basics are not done well, the effects of advanced mods will be limited.
Frequently Asked Questions
Does lubing a mechanical keyboard void the warranty?
Most manufacturers consider opening switches, desoldering, or modding the internals of the keyboard as actions that void the warranty. In some brands, simply replacing switches on a hot-swappable keyboard may not be an issue, but opening and lubing the switches can affect the manufacturer’s warranty. Checking warranty terms before starting work is the safest approach.
Can every mechanical switch be lubed?
No. Linear switches generally benefit the most from lubing. Tactile switches should be lubed carefully and with lighter amounts. In clicky switches, lubing the housing and click mechanism is often not recommended; only spring lubing to reduce ping sound can be done.
What should I do if I used too much lube?
If the switch feels heavy, sticky, or slow to return, you may have used too much lube. You can reopen the switch and use a clean brush, dry microfiber cloth, or appropriate cleaning method to reduce excess lube. Be cautious with aggressive chemicals as they may damage plastic parts.
Is switching out switches difficult on a hot-swap keyboard?
It’s not difficult when basic precautions are followed. Removing keycaps and using a switch puller to take out switches straight up, then aligning the pins of new switches for installation is usually sufficient. The critical point is not to force a bent pin and to avoid breaking the hot-swap socket.
Does switch replacement make the keyboard quieter?
Yes, with the right switch choice, the keyboard can become noticeably quieter. Transitioning from clicky switches to silent linear or silent tactile switches can make a significant difference. However, case resonance, keycap material, and stabilizer rattle also affect overall sound levels, so simply replacing switches may not always be sufficient on its own.
Conclusion
Mechanical Keyboard Lubing and Switch Replacement significantly improve the feel, sound, and daily usability of your keyboard when done correctly. The key to success is to check for compatibility, use less lube, act according to the switch type, and test at every stage. Start with a small group of switches on your first attempt; once satisfied with the results, proceed to the entire keyboard. While optimizing your physical equipment for more efficient work with technology, also check out Hostragons resources for a fast and reliable infrastructure for your digital projects: Hosting Packages and Domain Registration Guide.