 Afrikaans
 Azərbaycan
 Bosanski
 Čeština
 Dansk
Dansk Deutsch
 English
 Español
 Filipino
 Français
 Hrvatski
 Indonesia
 Italiano
 Magyar
 Melayu
 Nederlands
 Norsk
Norsk Oʻzbek
 Polski
 Português
 Română
 Slovenčina
 Slovenščina
 Suomi
Suomi Svenska
 Tiếng Việt
 Türkçe
 Ελληνικά
 Беларуская
 Български
 Русский
 Српски
 Українська
 עברית
עברית اردو
اردو العربية
 پښتو
پښتو فارسی
فارسی አማርኛ
አማርኛ मराठी
मराठी বাংলা
বাংলা தமிழ்
தமிழ் ไทย
ไทย မြန်မာ
 한국어
한국어 中文
中文 日本語
日本語

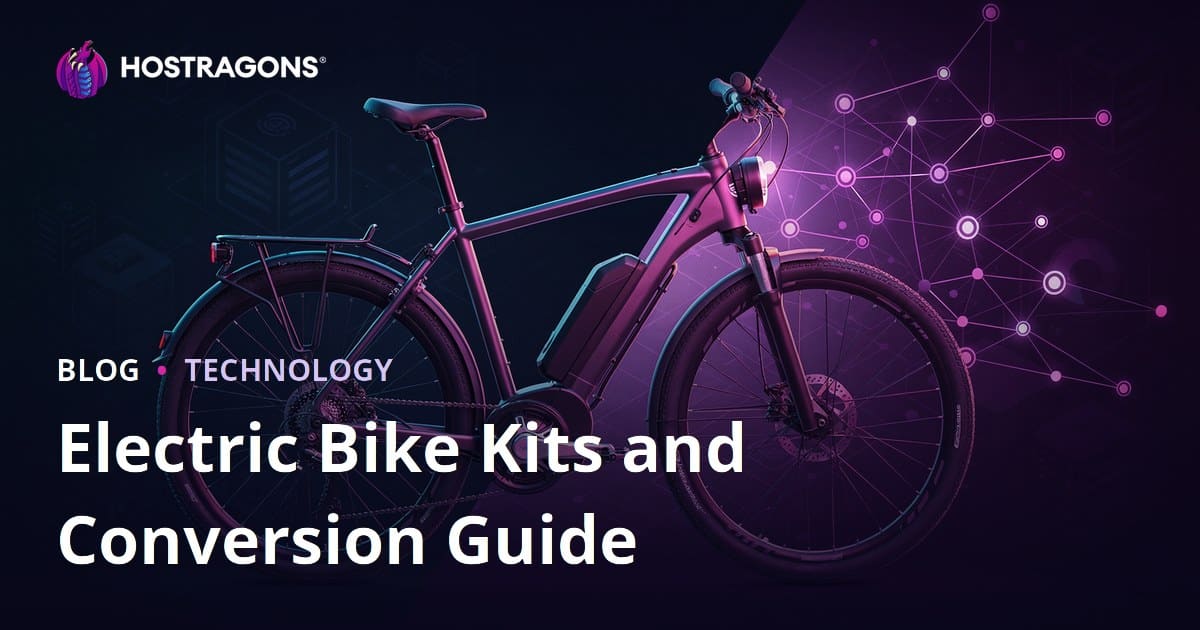
Electric Bike Conversion Kits and Guide provides an overview of how to transform your existing city, road, trekking, or mountain bike into an electric-assisted bike using the appropriate motor, battery, controller, and connectors. The right kit is chosen after considering frame compatibility, wheel size, brake system, battery capacity, intended usage, and local regulations. For a safe conversion, the bike's mechanical health is first assessed, followed by determining the type of motor, securely mount the battery, protect wiring from water and friction, conduct a low-speed test ride, and establish a regular maintenance plan.
This guide focuses specifically on electric bike kits and the conversion process. Its purpose is not to offer general electric transportation advice but to clarify which components to choose and why for users looking to convert their bikes, what mistakes to avoid, and how to budget effectively. Additionally, it contains practical tips for those interested in starting a blog, comparison site, or small e-commerce page in this niche.
What is an Electric Bike Conversion Kit?
An electric bike conversion kit is a set of components that adds a pedal-assist system or throttle support to a traditional bicycle. The most basic kit typically includes a motor, controller, battery connection, display or gauge, speed sensor, brake cut-off sensors, and a wiring harness. Some kits come with a battery, while others consist solely of the motor and electronic components. A common mistake during the purchasing phase is to focus solely on motor power while overlooking battery quality, frame compatibility, and braking capacity.
In practice, conversion does not mean turning a bicycle into a motorcycle. A well-installed electric motor assists the rider’s pedaling and reduces the load in challenging situations such as hills, wind, or long distances. For daily commutes of 8-15 kilometers, kits ranging from 250-500 W are generally sufficient for most users. However, for heavier riders, cargo transport, steep hills, or off-road use, torque, battery capacity, and braking systems become critical considerations.
Key Components of a Kit
- Motor: Can be a front hub, rear hub, or mid-drive motor. It is the component that most significantly affects the riding characteristics.
- Battery: Determines the system's range and overall weight. The higher the Wh rating, the greater the potential range.
- Controller: Manages how much power the motor receives. An incompatible controller increases the risk of overheating and failure.
- Display or remote: Shows support level, speed, battery status, and error codes.
- Sensors: Pedal assist sensor, speed sensor, and brake cut-off sensors ensure safe riding.
- Cables and connectors: Must be water, vibration, and abrasion resistant.
Who is it Suitable For, and Who Should Avoid It?
Electric conversion kits are suitable for users who have a sturdy bicycle, are willing to perform basic mechanical checks, and seek a more comfortable ride for daily commuting or as a hobby. They are particularly sensible for those who want to bike to work but struggle with hills, wish to use their car less, or want to extend their range on weekend rides.
Conversely, conversion is not recommended for bicycles with cracked frames, weak brakes, bent rims, problematic bearings, or very old components. Electric assistance adds speed and weight to a bike. Therefore, if the mechanical structure does not provide assurance, the bike should be upgraded first. Additionally, the legal limits surrounding electric systems can vary by country and usage area. In Turkey and Europe, the general approach often cites a pedal-assist limit of 250 W and a cut-off speed of 25 km/h; however, current regulations, traffic use, and insurance requirements should always be checked before purchase.
Types of Motors: Front Hub, Rear Hub, and Mid-Drive
The most critical decision in the Electric Bike Conversion Kits and Guide is the type of motor. This is because the location of the motor alters traction, weight distribution, maintenance needs, installation difficulty, and riding feel. The table below summarizes the most common options in terms of practical use.
| Kit Type | Advantages | Disadvantages | Best Use |
|---|---|---|---|
| Front Hub Motor | Installation is relatively easy and requires minimal intervention with the rear drivetrain. | Traction may weaken on wet surfaces, and fork durability is crucial. | Flat city roads, budget-friendly conversions. |
| Rear Hub Motor | Provides a more natural push sensation, and traction is generally better. | Requires attention to compatibility with the cassette, dropout, and freehub. | Daily commuting, moderate performance. |
| Mid-Drive Motor | Utilizes the bike's gears, making it efficient and balanced on inclines. | Installation is more complex, and wear on the chain and gears may increase. | Hilly routes, trekking, off-road, long tours. |
| Friction Drive Kit | Can be simple and lightweight; some models are easy to remove. | Efficiency is low, and tire wear or slipping in wet conditions may occur. | Experimental, short distances, light assistance needs. |
For low-speed use in the city on flat routes and with limited budgets, a front hub motor may be reasonable. For a more balanced experience, a rear hub motor is a safe middle ground for most conversions. In hilly areas, carrying heavy loads, or for touring, a mid-drive motor is more efficient, as it takes advantage of the bike's existing gear ratios. However, when selecting a mid-drive motor, you must measure the bottom bracket standard, chain line, and frame clearance.
Technical Criteria to Consider When Choosing the Right Kit
1. Motor Power and Torque
Motor power is generally expressed in watts. A 250 W motor complies more closely with legal limits and uses battery power more economically. 350 W and 500 W kits can offer more lively acceleration; however, they must be evaluated more carefully regarding regulations, heating, braking capacity, and battery consumption. In hill performance, torque is as important as wattage. Torque in the range of 40-60 Nm may be sufficient for city inclines, while higher torque may be needed for heavier riders and steep slopes.
2. Battery Capacity and Real Range
Battery capacity is calculated in Wh by multiplying voltage and amp-hours. For example, a 36 V 10 Ah battery offers approximately 360 Wh capacity. In flat city use, consumption may vary between 8-15 Wh/km for most users. In this case, a 360 Wh battery can ideally provide a range of about 24-45 km under optimal conditions. However, wind, tire pressure, rider weight, support level, temperature, and inclines can significantly affect this value. It's always wise to leave a 20% safety margin when calculating range.
3. Frame, Fork, and Dropout Compatibility
In motorized wheel kits, dropout width, axle type, and wheel size directly determine compatibility. There are different options for 26-inch, 27.5-inch, 28-inch, and 700C wheels. If using a front motor, it's crucial for safety to use a torque arm on aluminum forks. For rear motors, the number of gears, cassette or freehub standard, and compatibility with disc brakes or V-brakes must be checked. Even a one-millimeter measurement difference can make installation difficult.
4. Brake System
After electric conversion, the bike becomes heavier and faster. Therefore, brakes should not be deemed sufficient just because they are functional. Mechanical disc brakes may work for city use; hydraulic disc brakes provide more powerful and controlled stopping. If converting a bike with V-brakes, quality brake pads, clean rim surfaces, and proper adjustments are essential. Brake cut-off sensors enhance safety by cutting motor power when the brake lever is engaged.
5. Water, Dust, and Cable Management
Electric bikes can be used in the rain; however, not every kit is equally water-resistant. Connectors should be positioned to face downward, cable ends should not be loose, and the controller should not be placed in points where water can accumulate. Using spiral cable sheathing, plastic clamps, and connection tapes that do not harm the frame are small but important details.
Step-by-Step Electric Bike Conversion
Step 1: Conduct a Mechanical Inspection of the Bike
Before starting the conversion, check for cracks in the frame, bends in the fork, wobbles in the rim, play in the hubs, weakness in the brakes, and wear in the drivetrain. In a good practice, tires, brakes, chain, cassette, bottom bracket, and spokes should be evaluated first. If necessary, maintenance should be performed before conversion. It's normal for a 20-kilogram bike to increase to 25-28 kilograms with the electric system; this extra weight can quickly reveal weak components.
Step 2: Clarify the Usage Scenario
A daily 10 km flat route does not require the same kit selection as a 35 km hilly route. Ask yourself the following questions: What is my average distance? Are there steep hills on my route? Will I be carrying the bike up stairs? Will I be using it in the rain? Will I be carrying a child seat, bag, or cargo? These answers determine the motor type, battery capacity, and budget.
Step 3: Install the Hub Motor or Mid-Drive Motor
In hub motor kits, the existing wheel is removed, and the motorized wheel is installed in its place, with the axle nuts tightened according to the manufacturer’s torque specifications. The torque arm should not be overlooked, especially with powerful motors and aluminum dropouts. In mid-drive motor kits, the crank and bottom bracket are removed, the motor unit is placed in the bottom bracket shell, and it is secured with mounting plates. If the chain line is not checked at this stage, gear shifting may be compromised.
Step 4: Secure the Battery in a Safe Position
The battery is the heaviest component and should be positioned as close to the center of the bike as possible. Bottom tube batteries that attach to the water bottle cage offer a practical solution for weight distribution. Rack-mounted batteries are easy to install but may increase rear weight. The battery mount must fit snugly to the frame, the locking mechanism should not have gaps, and cables should not intrude into the movement area of the pedals, tires, or suspension.
Step 5: Make Connections for the Controller, Display, and Sensors
The controller should be placed in a location that allows for airflow but is protected from direct water exposure. The display is positioned on the handlebars in a way that does not obstruct visibility or interfere with the brakes and gear shifters. The pedal assist sensor should be mounted on the crank side in the correct orientation. While testing the brake sensors, the motor is activated with the wheel off the ground and the brake lever is lightly pressed; the motor should cut off immediately.
Step 6: Conduct the First Test Ride with Low Support
The initial ride should take place in a traffic-free or calm area. Observe take-off, braking, turning, gear shifting, and cable movement with the lowest support level. After a 5-10 minute ride, manually check the motor, controller, and battery connections; if overheating, looseness, or burning smells are detected, stop using it. After the first 50 km, the axle nuts, brake adjustments, and connection clamps should be checked again.
Cost Planning: A Cheaper Kit is Not Always More Economical
The cost of converting to an electric bike varies based on motor type, battery capacity, brand, service support, and additional parts. Entry-level hub motor kits can be set up on a lower budget; however, the overall ownership cost is determined by quality batteries, reliable BMS, good connectors, and service availability. A cheap battery may seem attractive initially, but due to capacity loss, unstable cells, or safety risks, it can be more expensive in the long run.
In a simple budgeting scenario, the motor kit, battery, installation labor, brake upgrades, new tires, lighting, and safety accessories should be listed as separate items. For example, in urban conversions, the battery can constitute 35-50% of the total budget. Failing to allocate a budget for brake and tire upgrades can make a high-performance kit unsafe.
Safety, Regulations, and Maintenance
Converting to an electric bike is as much a technical endeavor as it is focused on safety. A helmet, strong lighting, reflectors, a bell, and visible clothing should be considered essential gear for everyday use. The manufacturer’s original charger should be used for battery charging, and the battery should not be left overnight unattended or on flammable surfaces. If swelling, overheating, deformation after a fall, or a sharp smell are detected, the battery should not be used and must be shown to a qualified service.
Maintenance intervals should be considered more frequent than for a traditional bike. Weekly checks can be performed for tire pressure, brake strength, and visible cable damage. Monthly reviews should include axle nuts, torque arms, battery mounts, chain lubrication, and spoke inspections. Connector water accumulation should be checked after rainfall, and pressure washing should be avoided.
Micro Niche Content Opportunity: Building a Site on Electric Bike Kits
This topic is not only for technical enthusiasts but also represents a strong micro niche within digital publishing. Electric bike kits, conversion guides, battery comparisons, city-based route recommendations, maintenance checklists, and user experiences are all conducive to regular content production. When establishing such a site, a clear topic architecture yields better results than a general technology blog: beginner guides, product comparisons, installation steps, safety and regulations, troubleshooting, and real user tests.
For a micro niche site, having a quick, secure, and scalable infrastructure is crucial. Since technical guides will feature numerous visuals, tables, and videos, performance directly impacts user experience. At this stage, options for suitable hosting infrastructure include WordPress Hosting for standard projects or Web Hosting for more flexible projects. To maintain brand name integrity and create a memorable publication, it is wise to choose a short, easily pronounceable domain through the Domain Query and Domain Registration link.
In a high purchase-intent subject like electric bike kits, trust signals are also essential. Users expect the site to appear reliable before making expensive decisions regarding batteries, motors, and installations. Use of HTTPS, a clear contact page, author profiles, testing methodologies, and update dates are valuable for E-E-A-T. On the SSL side, using SSL Certificate is a fundamental step for both security and preventing browser warnings. As traffic increases, optimizing images, utilizing caching, and transitioning to more resourceful solutions like VPS Server when necessary will enhance site experience.
Sample Content Plan
- Introductory Post: Electric Bike Kits and Conversion Guide.
- Comparison Post: Differences Between 250 W and 500 W Kits.
- Technical Guide: Choosing Between 36 V and 48 V Batteries.
- Maintenance Content: Monthly Checklist for Electric Bikes.
- Troubleshooting: The Motor Works but Does Not Provide Support Error.
- Local Content: Choosing a Conversion Kit in Hilly Cities.
Common Conversion Mistakes
The first mistake is purchasing a kit based solely on the highest wattage. A powerful motor combined with weak brakes, a small battery, and an incompatible frame does not provide a good experience. The second mistake is assuming that range values from the catalog are absolute. The range provided by manufacturers often relies on low support, lightweight riders, and ideal ground conditions. The third mistake is neglecting cable management until later. Loose cables can rub against tires, connectors can become waterlogged, or steering can be restricted.
The fourth mistake is underestimating battery safety. Lithium batteries are safe when used correctly; however, low-quality cells, faulty chargers, and physical impacts pose risks. The fifth mistake is treating the converted bike like a maintenance-free vehicle. Electric assistance provides a joyful ride; however, chains, brakes, tires, and connections require regular checks.
Short Checklist Before Purchase
- Is the bike frame, fork, wheel, and brakes suitable for conversion?
- Are the wheel size, dropout width, and brake standard compatible with the kit?
- Is the motor type suitable for the usage route?
- Does the battery Wh capacity meet the real range needs?
- Do the controller, display, and sensors operate with the same voltage and protocol?
- Is service, spare parts, and warranty support available?
- Have local legal limits and usage rules been checked?
- Are upgrades for brakes, tires, and lighting planned post-installation?
Frequently Asked Questions
Can an electric bike conversion kit be installed on any bike?
No. Theoretically, many bikes can have kits installed; however, frame integrity, wheel size, dropout structure, brake type, and bottom bracket standard must be compatible. Conversion is not safe on bikes with cracked frames, weak forks, or low brake capacity.
Is a 250 W motor sufficient?
For flat urban routes, a 250 W pedal-assist system is often sufficient for light to medium-weight users. For steep hills, heavy loads, frequent stops, or off-road use, torque value, battery capacity, and motor type should be chosen more carefully.
How is range calculated for an electric bike kit?
The approximate range is calculated by dividing the battery's Wh value by the average consumption rate. For example, a 360 Wh battery and 12 Wh/km consumption gives approximately 30 km of range. Actual range varies based on rider weight, support level, hills, wind, tire pressure, and temperature.
Can I install it myself?
If you have experience with basic bike mechanics, the right tools, and electrical connections, you can install some kits yourself. However, for safety-critical components like brakes, batteries, controllers, and torque arms, obtaining experienced service support is a safer approach.
How often should maintenance be performed after conversion?
Weekly checks should be made for tire pressure, brakes, cables, and battery mounts. Monthly reviews should include axle nuts, chains, spokes, torque arms, and connectors. It is recommended to recheck all connections after the first 50 km.
Quick Summary and Next Steps
The best results in converting an electric bike come not from obtaining the most powerful motor, but from evaluating the bike's mechanical condition, your route, battery needs, safety components, and regulations together. If you plan to share your experiences by creating a blog or guide site under the Electric Bike Kits and Conversion Guide, you can start small with a reliable domain and fast hosting infrastructure, regularly developing your content.