 Afrikaans
 Azərbaycan
 Bosanski
 Čeština
 Dansk
Dansk Deutsch
 English
 Español
 Filipino
 Français
 Hrvatski
 Indonesia
 Italiano
 Magyar
 Melayu
 Nederlands
 Norsk
Norsk Oʻzbek
 Polski
 Português
 Română
 Slovenčina
 Slovenščina
 Suomi
Suomi Svenska
 Tiếng Việt
 Türkçe
 Ελληνικά
 Беларуская
 Български
 Русский
 Српски
 Українська
 עברית
עברית اردو
اردو العربية
 پښتو
پښتو فارسی
فارسی አማርኛ
አማርኛ मराठी
मराठी বাংলা
বাংলা தமிழ்
தமிழ் ไทย
ไทย မြန်မာ
 한국어
한국어 中文
中文 日本語
日本語

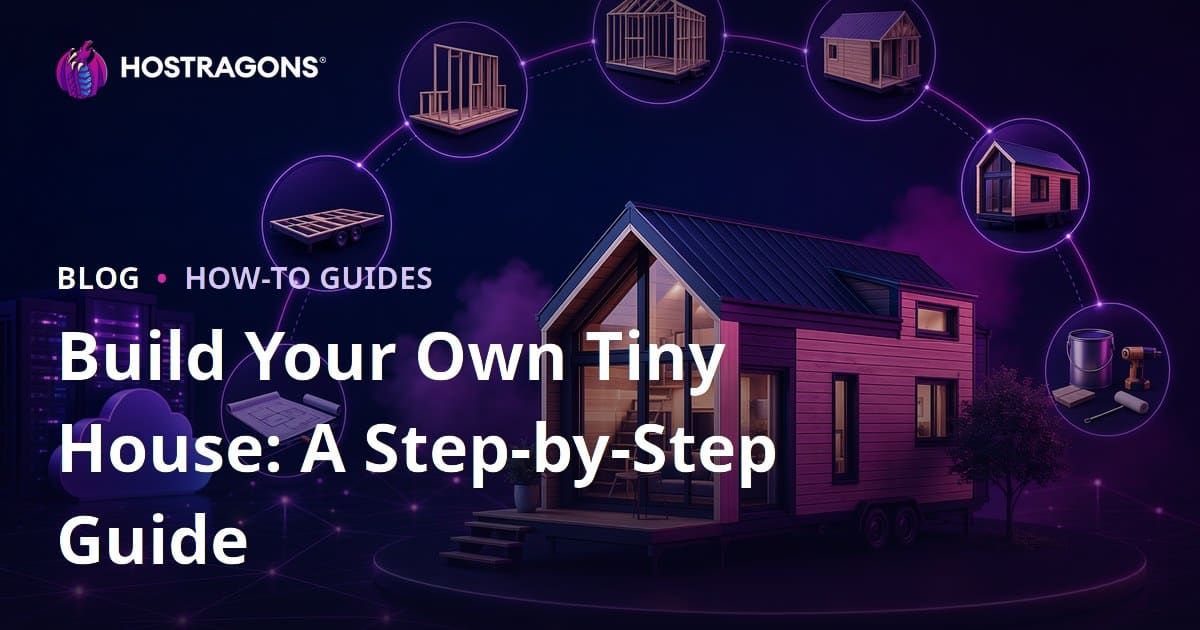
The process of building your own tiny house involves assessing your needs, checking legal requirements, ensuring a safe structural system, creating a realistic budget, implementing effective insulation, planning for utilities, and executing careful craftsmanship to construct a small yet livable home step by step. To start, clarify your intended use, determine maximum dimensions and weight, check local zoning and traffic regulations, and then proceed with drawings, a material list, a timeline, and safety procedures. This guide offers a practical roadmap from the initial idea to a ready-to-move-in tiny house.
While tiny house projects may seem simple from the outside, they actually require simultaneous consideration of architecture, carpentry, plumbing, electrical systems, insulation, weight calculations, and budget management. In a living space ranging from 15 to 30 m², every centimeter counts; a misplaced storage lid, an excessively heavy choice of surface material, or inadequate ventilation can compromise comfort in the long term. Therefore, the goal of building your own tiny house is not merely to use a hammer and drill; it is to manage the project as a cohesive system.
This article presents a plan that takes into account safety and realistic cost factors, tailored to your local conditions. If you wish to document your project through a blog or website, we have also highlighted suggestions for digital infrastructure such as domain names, hosting, and SSL certificates at relevant points: Domain Lookup, Web Hosting, and SSL Certificate.
Before Starting Your Own Tiny House Project
The first step is not to excitedly purchase materials but to clarify what you will be building. Will the tiny house be a full-time living space, a weekend getaway, a rental investment, a mobile office, or a workshop? Each use case entails different electrical, plumbing, storage, heating, and legal requirements. For instance, a house meant for permanent living may require a washing machine, a larger freshwater tank, good thermal insulation, and strong ventilation, while a weekend retreat might only need a simpler system.
The second critical factor is location. A tiny house that will be permanently installed on a lot does not follow the same planning logic as one that will be transported on a trailer. Zoning status, land classification, building permits, trailer registration, weight limits, and road safety must all be investigated. Consulting with local government, regional authorities, highway regulations, and possibly an architect or civil engineer can prevent costly mistakes later on.
Clarify Your Needs List
A successful tiny house design is based on real-life habits. Take note of your routines at home for a week: how many people live there, how many hours are worked, how much cooking is done, how much storage is needed for books, equipment, or clothing, and will guests be hosted? The answers to these questions directly affect the planning.
- Number of residents: 15-18 m² may suffice for one person; 20-25 m² is more comfortable for two people.
- Sleeping arrangements: Compare options such as loft beds, foldable beds, or permanent beds.
- Kitchen needs: Only coffee and small meals, or full cooking facilities?
- Bathroom preferences: Evaluate options like compost toilets, cassette toilets, or septic connections.
- Energy model: Plan for grid connection, solar panels, or a hybrid system.
- Seasonal use: If used in winter, increase the budget for insulation and heating.
Dimensions, Weight, and Portability Decision
In mobile tiny house designs, weight is the most critical limitation. Common designs in the U.S. are planned with a width of 8.5 feet, a length of 20-26 feet, and a target total weight of around 7,000 pounds. However, these figures can vary based on the towing capacity of the vehicle, the type of trailer, licensing status, and current regulations. Therefore, the carrier chassis, braking system, axle capacity, and weight distribution require professional inspection.
For stationary tiny house projects, foundational aspects, ground load capacity, drainage, frost risk, wind load, and fire safety are paramount. In both models, selecting lightweight yet durable materials is essential. For instance, fiber cement may be preferred over heavy natural stone for exterior cladding, while plywood and lightweight panels could substitute for thick solid doors inside.
Planning and Budgeting: A Realistic Roadmap
In the goal of building your own tiny house, the budget comprises more than just material costs. Transportation, hand tools, safety gear, waste allowance, consulting, permit or registration expenses, unexpected repairs, and time spent throughout the project must all be considered. The healthiest approach is to create a detailed itemized list and add an unexpected expense buffer of at least 15-25% to the total amount.
For example, the budget for a partially mobile tiny house measuring 23 feet long with approximately 200-250 square feet of living space can vary significantly based on material quality and labor rates. A budget-friendly DIY project may use second-hand equipment and simple finishes, while a fully comfortable four-season project may incur higher costs due to quality fixtures, high insulation, solar energy, good plumbing, and durable exterior cladding.
| Item | Budget-Friendly Approach | Comfort-Focused Approach | Points to Consider |
|---|---|---|---|
| Chassis or Foundation | Standard trailer or simple platform | Engineered chassis, reinforced foundation | Carrier safety is not negotiable |
| Frame | Wood frame | Wood or lightweight steel system | Moisture, connections, and load calculations must be checked |
| Insulation | Mineral wool or fiberglass | High-performance boards and vapor barrier | Condensation risk must be planned |
| Electricity | Grid-connected basic system | Solar panel, battery, inverter, and grid backup system | Requires inspection by a qualified electrician |
| Plumbing | Simple fresh and gray water tanks | Filtration, pressure pump, freeze protection | Leak tests must be carried out |
| Digital Presence | Free social media sharing | Domain name blog and project diary | A permanent archive can be established with WordPress Hosting |
How to Create a Timeline?
A tiny house project can take anywhere from 8 weeks to 8 months, depending on experience, team size, and design complexity. For someone working alone on weekends, a realistic timeframe is often 4-6 months. Breaking the process into phases helps maintain motivation and allows for early detection of errors.
- 1-2 weeks: Needs analysis, research, regulatory checks.
- 2-4 weeks: Measurements, drawings, budget, material list.
- 1-3 weeks: Preparation of chassis or foundation, ground platform.
- 2-4 weeks: Framing, walls, roof, and exterior cladding.
- 1-3 weeks: Electrical, plumbing, and insulation.
- 2-5 weeks: Interior finishing, furniture, painting, testing, and corrections.
At the end of each phase, create a checklist. Taking photos, noting measurements, and recording errors will be very helpful for future maintenance. If you wish to turn this record into a project blog, you can create a permanent digital diary in your name with Blog Launch Guide and Domain Lookup links.
Step-by-Step Tiny House Construction
1. Design and Technical Drawing
During the drawing phase, first determine the exterior dimensions, then the interior layout. Visualize the dimensions for doors, windows, outlets, lighting, water inlets and outlets, beds, cabinets, and kitchen in the same plan. A 10 cm error on paper looks small; in practice, it can prevent the refrigerator door from opening or render the shower space unusable. Free drawing tools may be sufficient to start; however, expert advice is needed for structural systems, chassis connections, and roof loads.
A good plan should include at least the following drawings: top-down layout, front-back and side elevations, cross-section view, electrical wiring diagram, plumbing diagram, and furniture details. Additionally, list all materials with dimensions, quantities, and approximate waste ratios. A waste allowance of 10-15% is normal for wood and panel products.
2. Preparing the Chassis, Foundation, or Platform
In a mobile model, the chassis is the backbone of the tiny house. Axle capacity, braking system, connection points, and rust protection must be correctly implemented. The ground platform should be securely fastened to the chassis and protected against moisture from water and road splashes. Using a waterproof membrane, appropriate panels, and an insulation layer on the underside ensures longevity.
For a stationary model, the ground must be level, drainage sufficient, and the foundation must be protected from frost, flooding, and settling risks. Simple concrete footings may be sufficient for some lightweight structures; however, decisions should not be made without knowing the ground conditions. Here, engineering inspection may appear as a small cost, but it is much cheaper than the damage caused by a wrong foundation choice.
3. Framing and Roof Installation
Wood framing is common in tiny house projects because it is lightweight, easy to work with, and provides efficient results with good insulation. The spacing of vertical studs is typically planned in the 40-60 cm range. Additional reinforcement is made around door and window openings. Galvanized screws, corner connections, and appropriate anchors should be used in connections. Once the frame is complete, the structure must be square and level; small irregularities can grow into larger issues during the cladding, window, and furniture stages.
In roof design, slope, water drainage, and weight are very important. A single-slope roof is simple and functional; a gabled roof looks more traditional but increases labor. Leaving a ventilation gap under the roof and correctly applying moisture insulation reduces the risk of condensation and mold.
4. Exterior Cladding, Water, and Wind Barrier
The exterior shell protects the tiny house from rain, wind, sun, and impacts. Suitable boards, breathable water barriers, ventilation strips, and external cladding can be applied over the frame. Wood cladding gives a warm appearance but requires regular maintenance. Metal cladding may be more durable; fiber cement can offer advantages in fire resistance and maintenance. In mobile projects, fastening elements must be vibration-resistant.
The installation of windows and doors is a critical stage for waterproofing. Simply using silicone is not sufficient; proper tape, drip profiles, and sloped sill details are required. If you see moisture or dripping inside during the first rain test, resolve the issue before closing the cladding.
5. Insulation, Vapor Balance, and Ventilation
Because tiny houses are compact, heat changes quickly. A well-insulated structure requires less energy to warm in winter and retains heat longer in summer. Insulation of 8-10 cm in walls and 10-15 cm in the roof is a good starting point in many climates; colder regions may require higher performance. Mineral wool offers advantages in fire resistance and sound insulation; rigid foam boards can provide high thermal resistance at low thickness.
One of the most common mistakes is neglecting ventilation. In a small house, moisture from cooking, showering, and breathing rises rapidly. Bathroom exhaust fans, kitchen ventilation, operable windows, and if necessary, a small heat recovery ventilation device enhance comfort. Incorporate airflow into the design to reduce condensation, mold, and unpleasant odors.
6. Electrical System
Electrical installations are not an area to be approached amateurishly due to safety concerns. The number of outlets, circuit breaker, ground fault interrupter, grounding, wire sizes, and safety in damp areas must be verified by a qualified electrician. For grid-connected usage, a standard distribution panel and protection elements are necessary. In solar-powered systems, panel capacity, charge controllers, inverters, battery capacity, and daily consumption must be balanced.
As a simple example: Daily consumption of 1.5-3 kWh may occur for a laptop, LED lighting, small refrigerator, water pump, and phone charging. These figures can significantly rise when using electric heaters, air conditioning, or electric stoves. Therefore, choosing energy-efficient devices and not relying solely on electricity for heating is often more practical in most projects.
7. Water, Waste, and Heating Solutions
A fresh water tank with a capacity of 100-300 liters may suffice, depending on usage habits. Higher capacity provides more comfort for full-time living. Gray water tanks collect waste from showers and sinks; randomly releasing this water into nature is not environmentally or legally appropriate. For toilets, options include compost, cassette, or sewer-septic connections. Each option's maintenance, odor, capacity, and legal compliance should be evaluated.
For heating, options include small wood stoves, LPG systems, diesel heaters, electric panels, or air conditioning. Wood stoves create ambiance but require careful consideration of chimney safety, carbon monoxide risks, and fire distances. Regardless of the chosen system, a carbon monoxide detector, smoke detector, and fire extinguisher should be standard equipment inside the tiny house.
8. Interior, Furniture, and Storage
The secret of comfort in a tiny house lies not in having many items but in well-measured functional furniture. Under-stair drawers, under-bed storage, foldable tables, wall-mounted shelves, and multi-purpose seating areas enhance quality of life. Lightweight plywood, marine-grade poplar, or laminated panels may be preferred in furniture production. While heavy solid furniture may be aesthetically pleasing, it increases the overall weight.
In interior finishing, light colors, large windows, and simple lines make the space feel more spacious. However, plans should be made for curtains or shades for privacy, sun control, and heat loss. In flooring, durability and ease of cleaning are essential; vinyl, laminate, or lightweight wood options can be considered.
Common Mistakes and Professional Tips
In DIY tiny house projects, many mistakes are not visible at the outset; they emerge after use begins. The most common issues include exceeding weight limits, inadequate ventilation, poor water insulation, unplanned electrical lines, low ceiling comfort, and lack of storage. The way to prevent these is through testing, measuring, and keeping photographic records at every stage.
- Calculate weight from the start: List the chassis, walls, roof, furniture, water tanks, and appliances.
- Combat moisture: Vapor balance, ventilation, and proper exterior shell layers should be central to the design.
- Leave service access: Components like pumps, valves, circuit boxes, and batteries should be easily accessible.
- Rough installations first, then cladding: Adding wires or pipes after the wall is closed can be costly.
- Don’t postpone fire safety: Detectors, extinguishers, and safe heating distances are essential.
- Create a prototype: Test kitchen, shower, and bed dimensions by sketching on the ground with cardboard or tape.
Why Document Your Project with a Blog is a Smart Idea?
The tiny house building process is not only a personal experience but also a valuable source of information that can inspire others. Regularly publishing your material choices, cost tables, mistakes, measurements, and before-and-after photos builds a community and can lead to future consulting, product collaborations, or rental promotions. Social media provides quick access; however, having your own domain and website serves as a permanent archive for your content.
For example, you could acquire a domain specific to your project and publish weekly progress updates. When selecting a domain, it's best to choose a short, memorable name without Turkish characters. You can start with the Domain Lookup step and evaluate Web Hosting for a photo-heavy blog or WordPress Hosting for easy management. Using SSL Certificate is also a fundamental requirement to ensure secure access for visitors to your site.
Organize your blog content plan like the construction phases: initial budget post, chassis selection, insulation comparison, solar energy installation, furniture drawings, monthly cost reports, and experiences after moving. This way, you will achieve better visibility in search engines and provide real data-based guidance to those embarking on the same journey.
Checklist: Before Ready to Move In
In the final phase, instead of rushing, conduct systematic checks. A tiny house may appear complete, but untested electrical lines, loose connections, leaking pipes, or inadequate ventilation can jeopardize safety. Conducting at least one week of trial use allows you to see deficiencies in real conditions.
- Is the electrical panel, breaker, ground fault interrupter, and grounding checked?
- Did the fresh water, gray water, and toilet systems pass leak tests?
- Are there leaks in the windows, doors, roof, and exterior cladding after rain?
- Are carbon monoxide and smoke detectors active while the heating system is running?
- In a mobile model, is weight distribution, tire pressure, brakes, and lighting checked?
- Is there any vibration observed in doors, windows, and exterior cladding in windy conditions?
- Is a fire extinguisher, first aid kit, and emergency exit plan ready?
- Is access to maintenance components like valves, pumps, batteries, and connections easy?
Conclusion
The idea of building your own tiny house is a powerful project that, when planned correctly, combines freedom, simple living, and the joy of creation. Success lies in not skipping legal checks, validating structural safety with experts, creating a realistic budget, paying attention to moisture and weight management, and testing each phase as you progress. Great comfort in small square footage emerges from attention to detail.
If you wish to document your project in a way that inspires others, you can create a permanent tiny house diary with your own domain and reliable hosting infrastructure. Start by exploring domain, hosting, and SSL options on Hostragons to share your story on a secure and organized website.
Frequently Asked Questions
Do you need to be an expert to build your tiny house?
You do not need to be a professional in every aspect; however, you should be prepared in measuring, basic carpentry, reading materials, and workplace safety. Critical areas such as electricity, structural systems, gas, chimneys, and legal compliance should always involve expert assistance.
How long does it take to build a tiny house?
For a simple tiny house project worked on by a single person on weekends, it generally takes 4-6 months. In a full-time working experienced team, this duration can drop to 8-12 weeks. Design complexity, material procurement, weather conditions, and permit processes affect the time required.
Is a permit needed for a tiny house?
The answer to this question varies depending on whether the tiny house is a fixed structure or a mobile trailer, where it will be located, and local regulations. The safest route is to obtain information from the municipality, relevant authorities, and, if necessary, a qualified architect or legal consultant.
Is solar energy sufficient for a tiny house?
A well-designed solar system may be sufficient for low-consumption uses such as lighting, phone charging, laptops, small refrigerators, and water pumps. For high-consumption devices like electric heaters, air conditioning, and electric stoves, the capacity of panels, batteries, and inverters must be significantly increased.
Is it sensible to open a blog for my tiny house project?
Yes. Sharing costs, drawings, mistakes, and experiences in a blog not only creates a personal archive but also helps others starting similar projects. With your own domain, hosting service, and SSL certificate, you can publish your content in a more permanent and reliable way compared to social media.